2023 Duck Recap

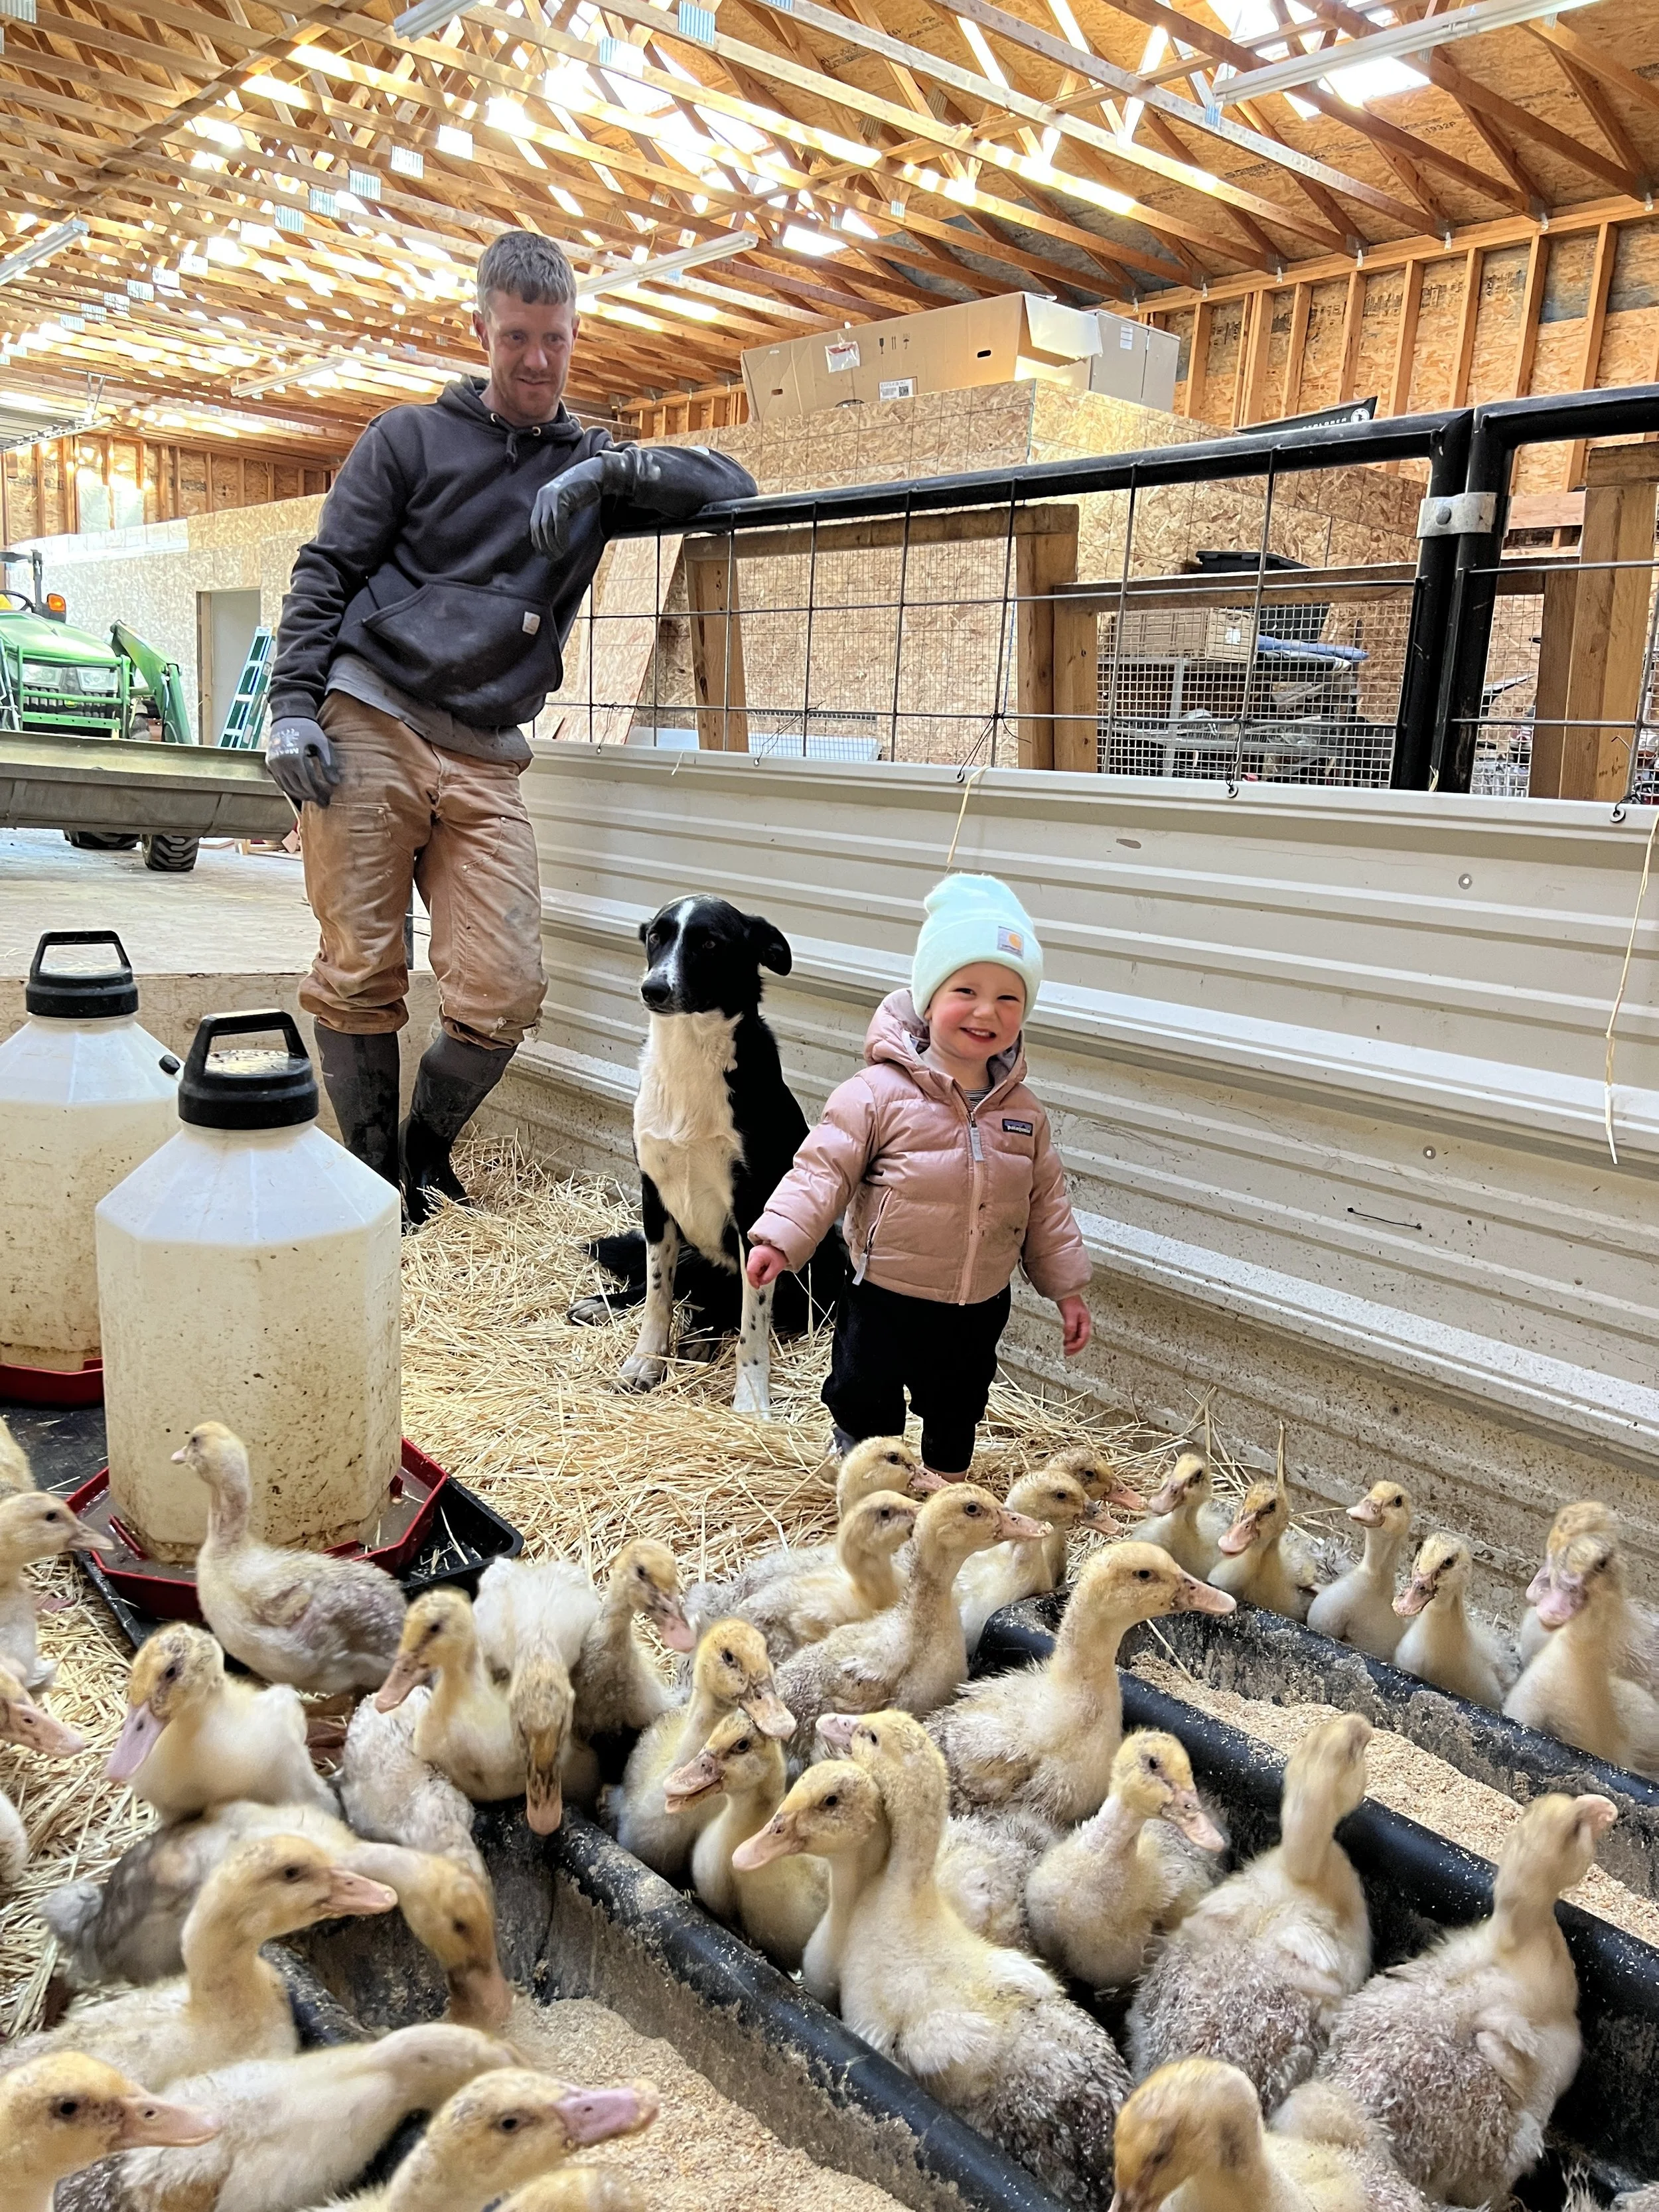
This last week, we processed 292 Pekin ducks here on the farm. The ducks arrived at the end of February as day old ducklings from a hatchery in California. Our long, long, never ending (still going) winter complicated our plans for the ducks a bit, but they still did great. Over the course of 8 weeks, we only lost 11 out of 303, which is amazing for any poultry that is shipped in the mail at 1 day old and raised free range.

Last year, we raised 125 ducks at the end of the summer. We had a huge learning curve with processing those ducks, and decided to do another batch before our meat chicken season really takes off this year. After having now raised ducks in late summer and early spring, a clear winner for time of year has emerged: late summer. While the ducks did just fine this spring, it is so much easier to do them in the summer. And while we had a heck of a time with processing them last year, this year it went much smoother. So we are continuing to learn and hope to raise more ducks in the future!

I’ve been thinking a lot this week about ducks vs. chickens, and what we’ve learned about ducks so far, and thought it would be neat to do a sort of “pros and cons” discussion of each.

First, the ducklings are hands down hardier and easier to raise than chicks. Their mortality is much lower in the early days and they seem to handle shipping much better than chicks. Last summer, we only had supplemental heat on the ducklings for 1 week, and this spring it was about 2 weeks. At that point, the ducks are perfectly fine to regulate their own body temperatures. Our current chicks are about 6 weeks old and we are just weaning them off supplemental heat now! In the summer, chicks sometimes only need heat for a few weeks, but it is very weather dependent. And while the ducklings need more and deeper water than the chicks, we haven’t found this to be overly problematic or messy.


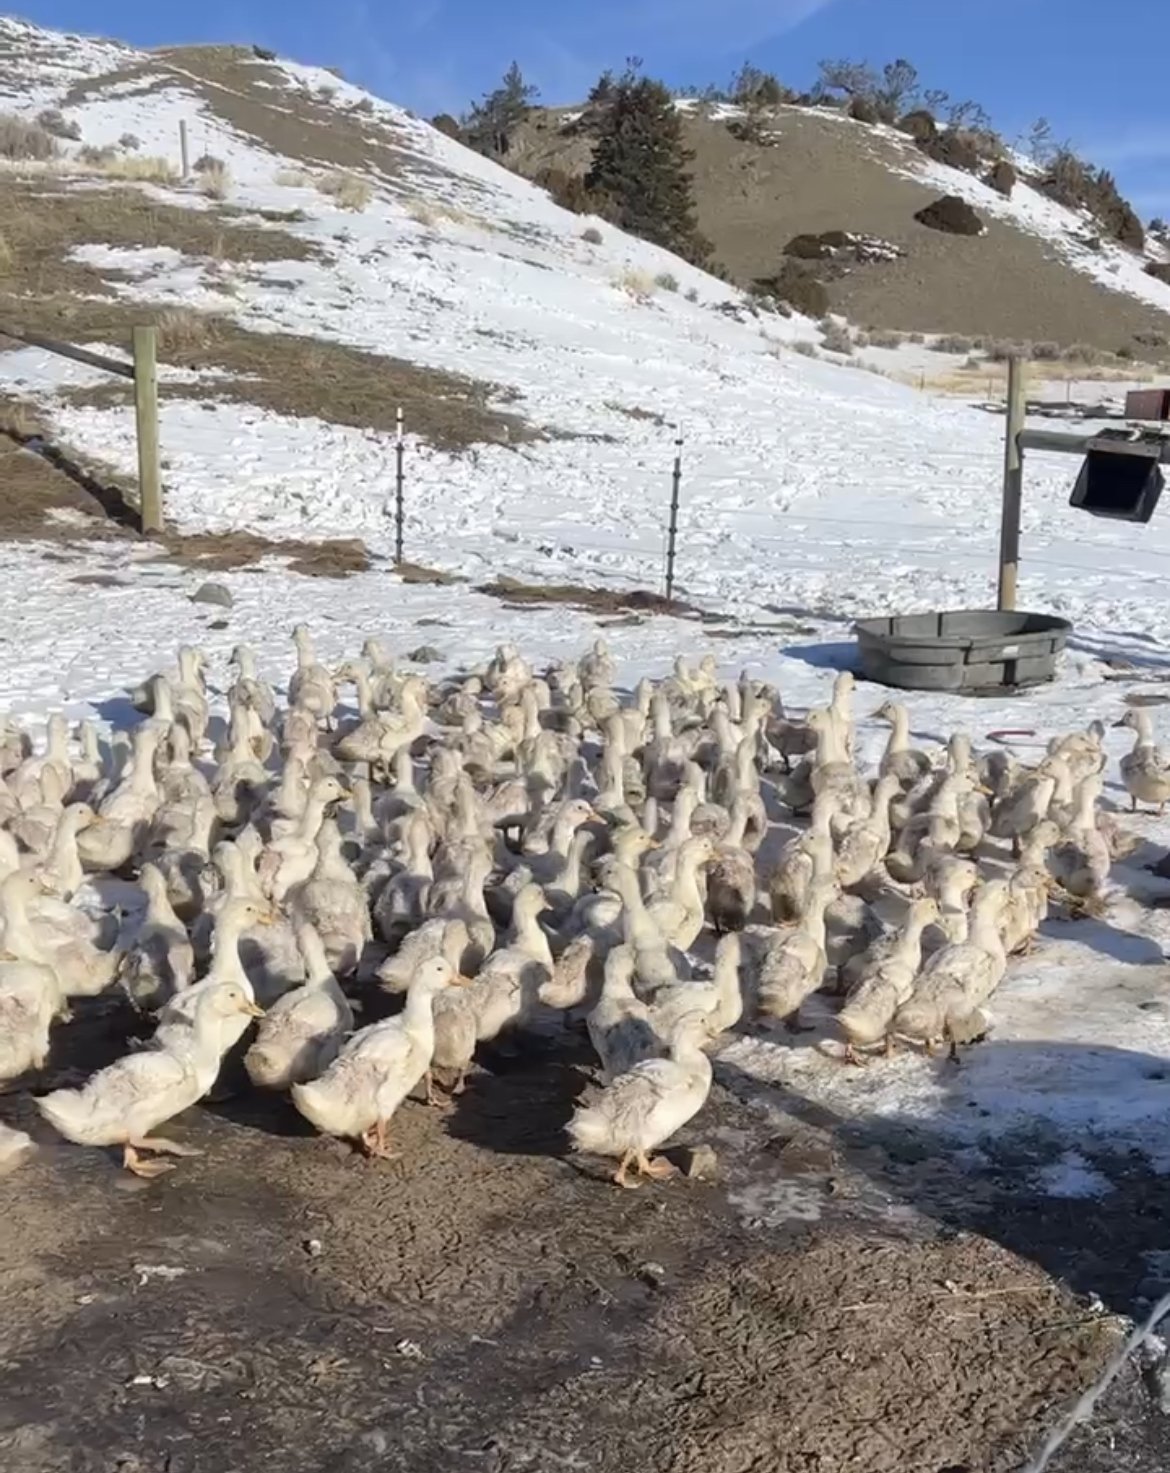
Second, ducks flock and herd, but chickens don’t. This makes moving the ducks (whether putting them away at night or loading them onto the trailer to go out to pasture) a piece of cake! Chickens scatter and go in a hundred directions, but ducks file neatly and easily wherever you’re trying to move them. It makes things SO much easier.

Third, the ducks grow much faster. Even on a corn and soy free feed (a very similar feed to what our chickens eat), the ducks are ready to butcher in 8 weeks. We raise our chickens to about 13-14 weeks. This doesn’t necessarily mean the ducks eat less though; they eat a lot in those 8 weeks! And, ducklings are about 3x more expensive than chicks, and our duck feed is more expensive than our chicken feed.

But, while the ducks seem generally easier to raise, they are not easier to process. The first reason is that you can only process ducks in certain “windows” relating to their molts. Ducks molt a number of times in their lives, notably at 8 and 12 weeks. When they molt, they lose their feathers and regrow new ones, and the new feathers are called “pin feathers.” The pin feathers first grow as short shafts before the rest of the feather comes out. If you try to process ducks after they molt and before the new feathers are fully grown, they will not pluck well and you’ll end up with lots and lots of feather shafts left behind. This is the lesson we learned the hard way last year. So this year, we processed them at 8 weeks and had NO pin feathers! Whereas last year we were only able to do 30 ducks per day, this year we did 150 per day! So that was MUCH better.

However, regardless of getting the timing right, ducks are still more laborious to process. Being waterfowl, they simply don’t pluck as well and a good number of them require some additional hand plucking (or waxing) after they come out of the plucker. Second, they are more difficult to eviscerate because their body cavity is smaller and narrower, their organs are generally more difficult to get out, and their skin is thicker.

So, the pros are that ducks are easier and more fun to raise. The cons are the processing is harder and more time consuming, and harder to get “perfect”. We read a blog from another farmer who raises thousands of ducks per year, and he said he finally had to change his idea of what a “sellable” duck is — meaning ducks do not pluck perfectly and may require some additional plucking by the consumer prior to cooking (or not! most feathers will just burn off). The farmer (or processor) simply can’t take the time to remove every single feather from every single duck. This was a nice reality check for us and has allowed us to give ourselves more grace throughout the process.

We hope you’ll try one (or more!) of these ducks! Below, you’ll find the information we sent home with our 2022 ducks, as well as some recipes.


Black dog farm duck information

Thanks for purchasing whole ducks from Black Dog Farm! These are Pekin meat ducks and were our test batch to gauge interest for duck in the community. Some important notes about your ducks:


  • Waterfowl are much harder to defeather than chickens are, so you may notice some down feathers (small, yellow, soft) and/or a few pin feathers (clear or white, hard, individual) on your ducks. If you are planning to eat the skin (you should!) you may need to spend just a few minutes removing those last feathers. The down feathers come off well by using your thumb to rub them off. The pin feathers come out with a good set of fingernails or a pair of needle nose pliers. We spent a lot of time defeathering the ducks, but just like with fish bones, sometimes there are a few left over.

  • Like all of our animals, these ducks were raised outside on pasture and lived real lives being real ducks. As a result, you may notice some imperfections, mostly minor skin imperfections like scratches or tiny bruises. These won’t affect the quality or taste of your ducks and are evidence of a good life lived.

  • We know that you all are purchasing our poultry because of the way we are raising it and because we are a small farm, using human labor (our hands) to raise and process our poultry. This means our finished product does not look like it was raised in a controlled environment and processed perfectly with state-of-the-art technology, and that we do not discard products that have minor imperfections. While I was researching and troubleshooting some processing difficulties we were having, I stumbled across an article written by another small farmer raising ducks for retail sale, which was helpful because the vast majority of information found online about processing ducks pertains to people raising small numbers of ducks for their own tables. After the last week of processing these ducks, a much slower process than we anticipated, and years of raising pastured poultry, the following quote from the article struck a chord with me:

“With this, though, we have also gradually adjusted our expectations of what a salable, tableready duck looks like. No longer do we have in mind a squeaky clean, sanitized bird that looks as little as possible as though it used to be living. Our ducks are the culmination of a human-scale, artisanal approach to poultry raising and processing, and if there remain a few tufts of down or stubs of feather shafts on each carcass, so much the better. Rather than a detriment to the process, we consider them the evidence that we are doing things the right way.”

We hope the above gives you some insight into these beautiful ducks you are about to enjoy!

Recipes & Notes On Cooking Whole Duck 

How To Roast A Whole Duck + Duck a l’Orange Recipe


One of my favorite resources for not only recipes but also the “how and why” of cooking an ingredient is the website Serious Eats. It offers tried and tested techniques and explains why those techniques work for a huge range of food. Here are some of their recommendations for how to roast a whole duck:

  • Unlike chicken that has delicate white meat that can easily get dry, duck is just as delicious served well-done as the commonly recommended medium rare.

  • Duck handles high heat REALLY well for 2 reasons: all of the meat is on the darker side, which means it is richer and oilier, allowing it to better withstand the drying effects of high temperature; and the fatty skin insulates the meat and bathes it in rendered fat as it cooks.

  • Cook & eat the duck with the skin.

  • DO NOT under roast your duck for fears of overcooking it. If the skin is great, the duck will be too.

  • Consider a boiling-water blanch prior to roasting (see the link below)

  • Consider pricking the skin with a sharp knife or skewer prior to cooking to help the fat render under the skin.

  • DO NOT start the duck at a lower temperature and then raise it; the skin and fat don’t brown and render well.

 Recipe & Article From serious Easts Duck a l'Orange

Smoked Duck

Another great way to cook a whole duck is smoking it. Here is a great article and recipe for How To Smoke Duck: www.theonlinegrill.com/smoked-duck

Even if you don’t have a smoker or don’t want to smoke your duck, this article is worth a read because it has some good information about cooking duck in general.

  •  Cook at 225F for about 4 hours to reach an internal temperature of 165F

  • Pierce the skin prior to cooking

  • Use a dry brine of kosher salt and allow to rest for at least 8 hours (or overnight) before smoking.

  • Baste your duck while it is smoking.

  • If you are having trouble achieving the internal temperature of 165F, cover with aluminum foil for the last hour.

Kira Jarosz
Garlic Ginger Ground Pork Lettuce Cups w/ Pork Cracklins

These fresh, delicious lettuce cups are an easy weeknight meal. This recipe is courtesy, again, of Lindsey at Forage and Fodder Kitchen. Try it out and let us know what you think!

1 lb Ground Pork

1 Medium Carrot, Peeled and Minced

4 Cloves Fresh Garlic, Minced

2 Tsp Fresh Ginger, Peeled and Minced

½ C Shiitake Mushrooms, Diced

1 Head of Butter Lettuce, Washed & Leaves Separated 

3 Green Onions, Finely Sliced

2 Tbsp Toasted Sesame Oil

3-4 Tbsp Soy Sauce or Tamari (GF)

2-3 Tbsp Honey

2 Tsp Toasted Sesame Seeds

Black Dog Farm Pork Cracklins To Finish

Chili Oil *Optional

Steamed Jasmine Rice *Optional

In a large pan, warm sesame oil on medium heat. Add in carrot, garlic and ginger, and sauté for a few minutes. Add in the ground pork, grinding down until well crumbled, cooking until well browned. Add in shiitake mushrooms and cook until tender, and pork is just about well done. Add in soy sauce and honey, stirring gently until sauce starts to bubble. Turn heat to simmer, and top with sliced green onions and sesame seeds, stirring well to combine.

Lay out lettuce cups onto a plate, filling each one with jasmine rice and the pork mixture. Top with more green onions, chili oil to taste, and finish with Pork Cracklins for delicious crunch.

Kira Jarosz
2022 Meat Chicken Season Recap!

Phew! We finally wound up our 2022 meat chicken season and butchered the last 130 chickens on Monday. Now, we just have the last of the large chickens to cut into pieces and then we will retire the processing facility until next year (and also give it some fun updates!). It has been both a great and a challenging season for a number of reasons and we are already making plans for 2023 based on lots of things that happened this season. We wanted to share about our season and our plans with you to give you a better glimpse into exactly how all of this happens.

We’ll start this blog off with a big win: as many of our probably already know, in 2022 we received our Animal Welfare Approved (AWA) certification for our meat chickens! Certified Animal Welfare Approved is an independent, nonprofit farm certification program and is the only label that guarantees animals are raised outdoors on pasture for their entire lives on an independent farm using truly sustainable, high-welfare farming practices. It is also the only label in the United States to require audited, high-welfare production, transport, and slaughter practices. Their standards were developed in collaboration with scientists, veterinarians, researchers, and farmers across the world to maximize practical, high-welfare farm management. In July, an auditor traveled to the farm from Maryland and spent an entire day observing our operation and our slaughter practices. The standards for meat chickens are very strict, and as a result, there are only a very few farms Certified Animal Welfare Approved for meat chickens in the country. The certification has standards and requirements for every single aspect of the process: where we get our chicks, how long they are in transport, how we raise them in the brooder, how we transport them to pasture, how we shelter, raise, protect, feed, and water them on pasture, the number of chickens per square foot of shelter and pasture space, how we catch them to slaughter, and how we slaughter them. They analyze our feed, our mortality rates, our shelters, and all of our farm records. Besides some (ok, a lot) of paperwork, we did not have to change any of our practices to gain our certification, and starting in August, the AWA label began appearing on all of our chicken products. We are really proud to have gained this certification, and feel it is a great way to communicate with our customers about how our chickens are raised. If you’d like to learn more about the AWA certification, and even read through the standards, information is available on their website by clicking here.

Now, we’ll move on to the challenges we faced this season. Since 2017, our chicks have been shipped to the Livingston Post Office via USPS when they are 1 day old from a hatchery in Pennsylvania. As soon as they arrive, we make the 10 minute drive to town, pick them up, and bring them back to the farm. The journey from Pennsylvania takes approximately 40 hours and the chicks are carefully packed into special ventilated chick boxes where they keep each other warm. However, shipping can be stressful on chicks and there are a lot of variables that determine how they do. Sometimes the weather on the east coast might be really hot or really cold, and the weather here in Montana might be the opposite. That makes it hard for the hatchery to pack the ideal number of chicks into each box; depending on the weather, they put more or fewer chicks per box to help regulate the temperature. Additionally, sometimes other things can happen, and chicks can end up in hot vehicles, sitting in the holding area of a plane, or handled roughly. Until this year, we have had very, very little shipping mortality with our chicks. In 2021 we received batches of 400 chicks every 2 weeks, and there would often be 0 dead on arrival, and sometimes one or two. However, this year, we received 1,000 chicks once per month, and we had multiple shipments where we had a LOT (sometimes hundreds) of chicks arrive dead. It was both heartbreaking and frustrating to see, and it complicated our season as we then had to wait for replacements, which disrupted our already tight schedule for raising and slaughtering this many chickens in just a few months. After talking with the hatchery, we assume the chicks were getting too hot during shipment, and after talking with other meat chicken farmers around the country, we have determined that this is an increasingly common problem as the USPS is stressed, understaffed, and overextended. While we are refunded for the cost of any chicks that arrive dead, another consequence of heat stress is that the surviving chicks can grow slower and not do as well, leading to increased mortality in the early weeks, lower weights, and/or taking longer to reach butcher weight, all of which is costly in one way or another. Our meat chicken season is so short because of our climate that we don’t have much time to make up for these losses, and if we have a group that doesn’t do well or grows slower, there really isn’t anything we can do about it.

In order to try to remedy this situation and mitigate the risks, we have decided to change hatcheries next year. We will be purchasing our chicks from a hatchery that buys their hatching eggs from the same hatchery we have been using in Pennsylvania, but the new hatchery is located in Oregon. Even more important, this hatchery ships chicks directly from their closest airport via air cargo to the Bozeman airport, where we will pick them up. This means transport time will be reduced from 40 hours to just a few hours, and there will be no time waiting in post offices or traveling in vehicles, and very few chances for them to get too hot or too cold. When I spoke to the Oregon hatchery, they said they began having so many issues with mortality that they no longer even offer shipping via USPS to Montana. We are hopeful that this new arrangement will greatly reduce shipping stress, leading to less mortality and more robust chicks. Fingers crossed.

This next challenge is more of a double-edged sword. In 2022, we had unprecedented demand for our meat chickens. At first glance, this may seem like a really great thing, and of course it is. However, it also means that we will not have chickens for sale for very much longer, and there will likely be a substantial (6 months or more) gap between when we sell out of chickens and when we have 2023 chickens available. Our goal has always been to raise enough chickens during our short, short season to have inventory to sell throughout as much of the year as possible. In years past we have run out of chickens sometime between February and April, before having the next season’s chickens available in June. However, this year, we have sold every single chicken we butchered every week since June, which means we haven’t stockpiled any for the off season. Currently, we have about 100 chickens left in the freezer, which is 1 large wholesale order or a few weeks of individual sales.

Every year since 2017 we have raised more chickens than the year prior. One big barrier to raising more chickens has been freezer space. In most areas of the country, farmers and food producers can rent commercial freezer space in a large freezer warehouse. However, there is one commercial freezer rental business in Bozeman and it has a long, long waitlist and very little space available. Freezing and storing chickens is a particular challenge: chickens need to be frozen upright on shelves, and once they’re frozen, they require a lot of space to store. If you throw them all into a big container, box, or a chest freezer to freeze, they will dent each other while they freeze. Also, because they are shrink wrapped, they need to be frozen upright to prevent leaking which would ruin the packaging. Once they’re frozen, they’re like trying to store bowling balls — unlike packages of sausage or pork chops, there is no great way to efficiently store them in boxes or on shelves. In order to try and solve this space issue in the long run, we sold our rental Tiny House to finance the construction of a huge walk-in freezer. Our current walk-in freezer is 8x8x8 feet and is barely big enough to store 1 week’s worth of chickens and our pork. Our new freezer is 13x35x8 feet and it is well on its way to being complete. We designed the new freezer to be big enough to allow us to store more chickens than we think we’ll ever raise. We are also planning to offer freezer rental space to other local food producers to ease the burden of the freezer bottleneck in our area.

So, what does all of this mean you can expect for next year? The new freezer means we can really expand the number of chickens we raise in 2023. This year, we purchased 4,000 chicks. Next year, we will purchase 8,000. Again, our goal is to have chicken available to our community for as much of the year as possible. In 2022, we sold a record number of Chicken CSAs — 60! While our CSA program is super important to us, as it helps to fund our early season costs before we have anything to sell, and has also been a great way to get to know our customers, it was a lot to manage this year. Next year, we will have fewer CSAs available and there will be some changes to the CSA program. Most notably, we will not be able to deliver CSA chickens to your home in any capacity next year — either by themselves or as an addition to an order. CSA chickens will be available for pick up on the farm or at any of the Bozeman farmers markets (there are over 30 during CSA season!). There will be more details about next year’s CSA in the new year, but, if you know you will want to purchase chickens in bulk or participate in our pick-up-at-your-convenience CSA program, plan to purchase your CSA when sign ups open in late winter. With fewer slots available, we expect they’ll sell out quickly.

Increased capacity and production hopefully also means we’ll have a more consistent stock of chicken pieces, and will be able to put some into storage for the winter, as well. We’ll be able to continue to supply a few amazing restaurants like Little Star Diner and Shred Monk with local, pasture raised chicken as close to year-round as possible. We are also hoping to be able to offer FRESH (never frozen), just butchered chickens intermittently throughout the season. We’d love to open up the farm for fresh chicken pick ups once a month or so. We have tons of ideas, first we just need the chickens.

If you purchased a CSA, whole chickens, or chicken cuts from us this year - THANK YOU! Your support gives us confidence to grow, and motivation to problem solve issues as they arise, which they inevitably do. If you want to have a few chickens in the freezer to get you through until July 2023 when chickens will next be available, you should buy them now. We are so grateful to get to raise your food.

Kira Jarosz
How To Cook Pasture Raised Chicken

We’ve heard from some of you that you still aren’t totally sure how to cook a pasture raised chicken, and we’re glad you asked! Pasture raised chickens are infinitely different than confinement raised commercial chickens you buy in the grocery store. First, we raise a heritage type chicken that has less breast meat and more dark meat (proportionally) than commercial Cornish Cross chickens, which are bred to have so much breast meat, and grow so fast, that they often can’t walk by 5-6 weeks of age. Second, our chickens are much more active and take much longer to grow (12-14 weeks compared to 6 weeks) than commercial chickens. These factors mean the meat has more texture and also more flavor since the animals are older. When we say texture, we do not mean that pasture raised chickens are inevitably tough or rubbery — they aren’t. We mean the meat will have more “bite” to it. But, they do require some adjustments and consideration when cooking. Lastly, commercial chickens generally have more fat than pasture raised chickens since they are less active, are fed diets of corn and soy, and are encouraged to eat 24 hours a day by being raised with continuous light. This is an important consideration, as the amount of fat on a chicken really affects how it cooks, and fat commercially raised chickens are simply more forgiving when you’re cooking them. You can expect that any of our chickens over 4# will have a considerable amount of fat. The amount of fat on chickens less than 4# varies — some have quite a bit and some have less.

Below, you will find three different ways to cook the perfect pasture raised chicken. We often tell people that our chicken is simply a different product than what you can buy in the grocery store; but it is also how chicken is supposed to taste, and when done right, a pasture raised chicken is knock-your-socks-off delicious, and so, so much better for you, the animals, and the environment. With that being said, with an understanding of why you need to cook pasture raised chicken differently, and with a few tools in your cooking toolbox, you can cook the perfect pasture raised chicken. So, please spend a few minutes (even an hour!) reading through the following information, reading the information included in the links, and really gaining an understanding of this process. We promise, it isn’t complicated.

Method 1: Roasted or Grilled Spatchcock Chicken

If you’ve ever talked to us about cooking our chicken, you know that this is our favorite and go-to way to make a delicious roast chicken. This is best done with a chicken that has more fat, so in general, a chicken that is over 4#. However, lots of our chickens under 4# have plenty of fat. You can assess this by looking at the chicken and seeing whether you see fat under the skin and around the “stuffing hole” at the bottom of the chicken between the legs. If you think you have a chicken with less fat, save this method for one that has more fat, and use Method 2 or 3 below.

“Spatchcock” simply means removing the backbone and butterflying the chicken. You can use a sharp knife or pair of kitchen shears to cut down either side of the backbone of the chicken and remove it. You then turn the chicken over so it is breast-side-up, put pressure with your thumbs on the breast bone, and push down to break the breast bone and lay the chicken flat into a butterfly shape. Let your chicken rest on the counter for 20-30 minutes before cooking so you are not putting a cold chicken into a hot oven or grill.

We recommend using olive oil or butter, either under the skin or liberally on the outside all over the bird. This provides some additional fat during the cooking process. Then, season your chicken with salt and pepper and whatever other seasoning you like: herbs, paprika, etc. — or just salt and pepper!

Preheat your oven or grill to 400F, and then place your chicken on a cookie sheet if using the oven, or directly onto the grill rack if using a grill. A 4# chicken will cook quickly — around 45 minutes in a 400F oven. If you are unsure when your chicken is done, buy a cheap meat thermometer at the store. Your chicken is done when the thickest part of the breast or thigh reads 160F. People are often used to commercial chickens taking much longer to cook, and overcooking is a very common reason your chicken is tough and dry.

There are lots of benefits to the spatchcock method. First, the skin ends up amazingly browned, evenly crispy, and delicious. Second, the chicken cooks more evenly and cooks faster. For an even more delicious, moist, tender chicken, we strongly recommend brining your chicken. We recommend a 24-72 hour dry brine (see link below), which is simply salting your chicken and putting it in the fridge until you’re ready to cook it. Then you rinse your chicken and prepare as described above.

Links for Method 1:

Dry Brining Information: Serious Eats Dry Brining

Spatchcock Information & Recipe (with pictures): Serious Eats Spatchcock 101

Method 2: Dutch Oven Roast Chicken

This method is a little bit “easier” and more foolproof, and a great place to start if you are feeling overwhelmed. A heavy, oven safe pot with a lid, such as a Dutch Oven, traps the moisture as the chicken cooks, and allows it to absorb all the flavor from onion, garlic, vegetables, and seasoning.

Preheat your oven to 350-425F — you can roast it lower & slower, or higher & faster.

Then, put your vegetables, such as garlic, onion, celery, and carrots in the bottom of your pot. Then place your chicken, breast side up, on top of the vegetables. Pat your chicken dry, then rub liberally with butter (or olive oil) and season with salt, pepper, and whatever herbs you’d like. Some recipes suggest stuffing the cavity, and you can certainly do this instead or in addition to placing the chicken on a bed of vegetables. Before placing your pot into the oven, add 1 cup of water or chicken broth to the bottom of the pot. This helps provide additional moisture for cooking.

Put the lid on the pot and place into the oven. At a lower temperature, you can expect a 4# chicken to take approximately 2 hours to cook. At a hotter temperature, it may only be 1.25-1.5 hours. Monitor your chicken & veggies during the cooking process to make sure the vegetables aren’t burning and there is still liquid in the bottom of the pot. You can add more water (or chicken broth) as needed.

You can consider removing the lid for the last 20-30 minutes of cooking to brown & crisp the skin if you prefer. Your chicken is done when a meat thermometer reads 160F in the thickest part of the thigh or breast.

You can certainly dry brine your chicken, as recommended above in Method 1, if using Method 2, as well. A brine is never a bad idea!

Links for Method 2:

Recipe: Dutch Oven Whole Roasted Chicken Recipe **WE RECOMMEND ADDING 1 CUP OF WATER OR BROTH TO YOUR DUTCH OVEN BEFORE ROASTING & THEN ADDING MORE AS NEEDED DURING COOKING

Method 3: Slow Cooker or Instant Pot Whole Chicken (+ Chicken Soup)

This is an absolutely foolproof way to cook a chicken. The result is tender, moist, delicious shredded chicken — so it is not a roasted whole chicken. You can use the chicken for soups, curries, enchiladas, pastas, salads, tacos or just eat it as the meat portion of your meal. You can further season the chicken after it comes off the carcass, or add sauces for whatever end result you’re looking for. One of my favorite things to do is make a tomato chipotle sauce on the stove, mix it with shredded chicken and make chicken tacos.

Place your chicken in your slow cooker or instant pot. Season with salt and pepper. If you have an end recipe in mind, you can add appropriate seasonings. For example, if you are making chicken tacos, you may want to add chili powder, paprika, garlic powder, onion powder, etc. If you are making chicken salad, you could add tarragon, garlic powder, etc. If you’d like, you can also add vegetables to your pot or slow cooker, though I usually don’t see the need unless I am making chicken soup. Once seasoned, add enough water to just cover your chicken, or to the Pressure Cooking Max line in your Instant Pot if covering the chicken with water would cause your water level to be above this line. Set your Instant Pot to high pressure for 45-60 minutes depending on the size of your chicken. You aren’t going to overcook it, so don’t worry. You can also put a whole frozen chicken into your Instant Pot and cook at high pressure for 90 minutes! If using a slow cooker, cook a thawed chicken on high for 6-8 hours.

Once your chicken is done, either release the pressure manually or allow it to release on its own if using an Instant Pot. Remove the chicken as best you can from the pot (I use tongs and a large fork) and place the chicken on a plate; it will be falling apart. Place a colander over a large pot in your sink, and pour the rest of the broth and chicken pieces into the colander. Remove useable chicken from your colander and place it on the plate with the rest of your chicken. What you now have in the pot in your sink is amazing chicken broth. If you are not making soup, put the broth in a container and store in your fridge or freezer — it keeps for a long time in the fridge!

Once the chicken is cool, remove all of the chicken from the bones. Discard the bones and you are left with delicious shredded chicken! You can shred or chop the chicken into whatever size you want.

If I am making chicken soup, I put the broth back in my pot, turn it on, add whatever vegetables I want (carrots, celery, peas, cabbage, etc.) until they’re tender, then add my pasta or cooked rice, and then add back in my shredded chicken. Note: if you cooked your chicken initially with vegetables, discard these when the chicken is done. They will be mushy and not great for adding back into your soup. Use fresh vegetables for your soup.

Kira Jarosz
Crispy Chicken Thighs with Creamy Roasted Tomato Sauce

Another great recipe from forage & fodder kitchen for you: The chicken in this recipe has amazingly crispy skin and succulent moist meat, and the tomato sauce is creamy and delicious. Serve it with a vegetable side dish of your choice, or for a super feel-good meal, make a quick grilled cheese to dip in the tomato sauce.

INGREDIENTS

4 Bone-In Pasture Raised Chicken Thighs

4 Large Tomatoes, Quartered (Any variety of colors)

3 Garlic Cloves

1 Large Shallot, Sliced

3 Large Carrots, Peeled & Chopped

1/2 C Heavy Cream

Olive Oil

Avocado Oil

1 Tsp Thyme

1 Tsp Basil

2 Sprigs Of Fresh Rosemary or 1 Tsp Dried

Kosher Salt & Pepper To Taste


DIRECTIONS

Preheat oven to 350F. In a large Dutch oven, layer in tomatoes, garlic, shallot, and carrots. Drizzle olive oil generously on top, seasoning with dry herbs, salt and pepper. Set aside.

Remove chicken thighs from packaging and pat dry with a paper towel to remove excess moisture. Season skin well with salt and pepper.

Heat a large skillet on medium heat and add in 2 tbsp of avocado oil, make sure pan is well coated. Once pan is well heated, sear thighs skin side down. Sear until a nice golden-brown color is achieved, remove and set aside, skin side up. Do not overcook.

Transfer thighs to the Dutch oven and place gently on top of the tomato mixture, skin side facing up. Place fresh rosemary sprigs on top of chicken, and place in the oven on the middle rack. Bake for approximately 45 minutes, or until chicken reaches an internal temp of 165F and is tender. Time may vary. Remove thighs and place on a baking sheet with a wire rack, and lightly tent with foil to keep warm.

Change oven to the broil setting and continue to roast the tomato mix for another 10 minutes or so, checking every few minutes. Once everything is bubbly, well roasted, and carrots are tender, remove from the oven and transfer to the stove (no need to turn on heat, yet). Puree tomato mix with a hand blender or an immersion blender. *Caution: Mixture will be HOT, start low to avoid splattering.

Blend until smooth, leaving a little bit of texture. Turn heat to simmer and add in heavy cream, stirring slowly until sauce starts to thicken a bit; do not boil. Season with more salt, if needed. Turn off heat and you're ready to serve!

*Tip: Place chicken thighs in broiler uncovered for a couple of minutes to reheat, and give the skin a little extra crisp; do over-cook.

Spoon a generous amount of sauce onto a plate and place chicken thighs on top. Serve with a side of pasta or roasted potatoes to compliment the star of the show!

*Store extra sauce for other dishes or serve with a grilled cheese for dipping! Yum!


Kira Jarosz
Smoky Ham Hock & Split Pea Soup

Soup season has commenced! Smoky, chunky ham with hardy split peas, this soup is checks all the boxes when it comes to flavor and comfort.


1.5-2 Lb Black Dog Farm Ham Hock

1 Lb Split Peas, Sorted, Rinsed, & Divided In Half

3 Tbsp Olive Oil

1 Yellow Onion, Diced

1 C Carrots, Sliced

1 C Celery, Diced

8-9 C Chicken Stock

3-4 Sprigs Of Fresh Thyme

2 Bay Leaves

1 Tsp Black Pepper

Kosher Salt to Taste


Heat olive oil on medium heat in a large pot. Add in onions, carrot and celery and sauté for 2 mins. Season generously with salt, pepper and add in thyme. Turn heat down to simmer, add in half of the split peas, and mix together. Place ham hock in the center on top of the vegetables & peas. Pour in 8-9 C of chicken stock, and stir gently. Ham hock should be submerged about 1 inch under the stock. Turn heat back up to medium, and bring to a gentle boil and stir well. Cover with lid, reduce heat down to low, and cook for 45 minutes, stirring occasionally.

Add in the remainder of the peas, stir well and cover. Continue to cook for 1 hour more, stirring occasionally, or until peas are fully cooked and meat is tender. Discard thyme stems, remove the ham hock and place on a cutting board. Trim excess fat, unwanted pieces and remove meat off the bone. Chop into small chunks, and add them back into the soup. Season with more kosher salt if necessary, and serve hot with toasty bread for dipping! Enjoy!

Kira Jarosz
Easy Sheet Pan Kielbasa with Gnocchi & Butternut Squash

Have you ever tried Kielbasa? Kielbasa is a Polish sausage with a savory, mild flavor of garlic, smoke, cloves, pimentos, and marjoram. It is DELICIOUS! The recipe below is a super easy way to make a quick weeknight meal with Kielbasa. Another one of my favorite Kielbasa recipes is this Kielbasa With Creamy Mustard Pasta. Add some Kielbasa to your next order and let us know what you think!


4 Black Dog Kielbasa Links, Thawed

2 C Butternut Squash, Cut Into 1" Cubes

1 Yellow Onion, Halved & Finely Sliced

1 Pkg Italian Gnocchi (Appx. 1 lb)

2-3 Tbsp Olive Oil

4-6 Pats Of Butter

1 1/2 Tsp Dry Sage

1 Tsp Dry Thyme

1/2 Tsp Black Pepper

Salt to taste

Note: Gnocchi is already salty, so use salt sparingly


Heat oven to 425 F. In a large bowl, combine butternut squash, onion, gnocchi, olive oil, spices and salt to taste (see note), and mix well.

Line a large sheet pan with parchment paper, and pour mixture evenly across the pan. Nestle Kielbasa links into the mix, spacing out evenly across the pan. Top exposed squash and gnocchi mix with pats of butter.

Cover the pan with foil and seal all edges tightly. Place in oven, and cook for 20 minutes. Remove the foil, and place back in the oven for another 15 minutes. Remove again, stir mixture and flip Kielbasa links over. Turn on broiler, and place sheet pan back in to brown for 5 mins. Flip links again and cook another 5 mins until well browned, squash is well roasted, and gnocchi are slightly crispy, but soft in the center.

Note: Cooking times may vary. Links are fully cooked with an internal temp of 165 F.

Remove from oven and serve immediately. Scoop squash and gnocchi mix onto a plate, and serve Kielbasa whole or sliced. Enjoy!

 
Kira Jarosz
Pumpkin Seed Crusted Pork Chops with Creamy Chive Polenta

We are excited to be partnering with Lindsey from Forage and Fodder Kitchen to bring you delicious recipes featuring our products! We hope these recipes can serve as a source of inspiration for you when you’re shopping & planning what to cook. First up, Pumpkin Seed Crusted Pork Chops with Creamy Chive Polenta.

With fall here, cozy comfort meals are on the rise. What shouts "Fall" more than pumpkin? Better yet, pumpkin seeds! These amazing little seeds are not only full of nutrition, they pack a delicious nutty flavor when toasted, as well. They create the perfect crunchy crust, to compliment these delicious juicy chops. Serve them over dreamy creamy polenta, and you have yourself a perfect pair.


Pork Chops:

2 Pasture Raised Bone-In Pork Chops

1/2 C Pumpkin Seeds

1 Large Clove Fresh Garlic

2-3 Tbsp Flour

1-2 Eggs, Beaten

1 Tsp Thyme

Salt and Pepper to Taste

2 Tbsp Avocado Oil

Preheat oven to 425F.

In a food processor, combine pumpkin seeds and 1 clove of garlic. Pulse until roughly chopped. Add in flour, thyme, a generous amount of salt, pepper, and pulse a few more times to combine. Place mixture on a plate and spread out evenly. Beat eggs and pour onto another dish, and set next to flour mixture.

Pat pork chops dry with a paper towel, and set aside. Heat avocado oil in a large pan on medium heat. Dip pork chops one at a time into the egg wash, then into flour mixture. Coat well and pat seeds down to ensure chops are well coated for a nice crust. Transfer to pan, and brown the chops for a couple minutes on each side, until a golden color is achieved. Do not fully cook.

Transfer chops onto a wire rack, on top of a baking sheet. Place in oven and bake for 20-30 mins, or until fully cooked; time will vary due to thickness. Using a meat thermometer, check internal temp at thickest point for desired wellness; a minimum of 145F.

Let rest for 5 minutes and serve warm with polenta.

Polenta:

4 C Water

1 Tsp Kosher Salt

1 C Polenta or Medium Ground Corn Meal

2-3 Tbsp Polenta

2 Tbsp Butter

2-3 Dashes Heavy Cream

Chives, Finely Chopped

In a large saucepan, bring water and salt to a boil. Add polenta slowly into boiling water, whisking constantly until all polenta is well stirred, and there are no lumps.

Reduce heat to low and simmer, stirring often, until polenta starts to thicken. Polenta mixture should still be slightly loose, but it's ok to let thicken a bit, since you'll be adding heavy cream at the end.

Cover and cook on low for 30 minutes, stirring every 5 minutes. Polenta is done when the texture is creamy and the grains are tender to the bite.

Turn off heat and gently stir in 2 tablespoons of butter, a few dashes of cream, and sprinkle in chives.

Cover and let sit for 5 minutes to thicken. Add salt to taste, and serve warm.

Kira Jarosz